Welcome to FPVDronePilots!
Join our free FPV drone community today!
Sign up

Robocat 270 build

kenjancef

Active Member
Joined
Mar 10, 2016
Messages
30
Reaction score
20
Age
58
So here is my current (second) quad build. It is a Robocat 270, based on a Robocat frame from HobbyKing. Here is a parts list:

Robocat 270 CF frame
RCX 2205 2350kv motors
DYS XM20A ESC
Matek 5-in-1 PDB
Naze32 FC (soon to be SP Racing F3 clone)
FrSky D4R-II
FT799 video Tx
Sony 600tvl camera
4S 1,400mAh battery
5045 bullnose props

I think that's it. The yellow trim on the frame was done with an oil-based Yellow Sharpie marker (don't give this one to the kids...). Going to try to build it as neat as I can, and I'll post pictures as I go....

This is a dry-fit of most of the parts, I just wanted to see how it all looked put together...

IMG_0547.JPG


Here is a quick view from the back... I'm trying to get a shorter antenna extension cable...

IMG_0548.JPG


And I just finished soldering the basics onto the PDB... I used hot glue to cover the solder points, so it looks a lot worse than it really is...

Robocat 270 PDB.jpg
 
I just finished building my Robocat 270. It was a kit that I got from coastlinerobotics. It is my first build but not my first drone, and I got it going up to 50 mph on the first flight out in the field (it may have been going into or away from the wind, I do not know but the wind was reaching 10-15 mph that day)
 
I got the upgraded PDB, it makes everything much cleaner. Also, my ESCS were too big to fit inside or on the arms so I put them on the bottom of the frame, and that seems to work fine.
 
Love the look of this! I worry about your solder connections though as the are "loose" looking. Did you use flux? if not try to get some and touch your connections up so you don't have one fail and short out something. Beautiful build and looks like a beast!

(edit) Just noticed you stated you used hot glue, Not sure if I would have done that, but should be easy enough to remove.
 
hm... yea i would have just used flux. i waited 8 days while my drone was just sitting unassembled on my workbench, because it really does help (at least it helps me, i dont know how much it would help you)
problem is the LED's burned out because the 14.8V battery was too strong for them, so new ones are arriving on thursday
 
  • Like
Reactions: Hebrews12v2
Love the look of this! I worry about your solder connections though as the are "loose" looking. Did you use flux? if not try to get some and touch your connections up so you don't have one fail and short out something. Beautiful build and looks like a beast!

(edit) Just noticed you stated you used hot glue, Not sure if I would have done that, but should be easy enough to remove.

My soldering skills are amateur at best,but I didn't think I needed flux when using 60/40 solder, and it saying that I didn't need it. If I do need it, how do I use it?

Oh, and a side note... I'm not using that PDB anymore, it turns out it is defective. And I'm sure it's not due to my lack of soldering skills.. lol...
 
you should get the upgraded PDB its only about $20 and really helps to keep things organized
 
Are you talking about this one?

Flycat 1.JPG

If so... yea, I am back to that one now. It seems the small PDB I pictured earlier is defective, so I went to this one.
 
My soldering skills are amateur at best,but I didn't think I needed flux when using 60/40 solder, and it saying that I didn't need it. If I do need it, how do I use it?

Oh, and a side note... I'm not using that PDB anymore, it turns out it is defective. And I'm sure it's not due to my lack of soldering skills.. lol...

Soldering without Flux: If you don't have any flux to add to your soldering, tin( put hot solder on each wire and PCB contact first, then join them) the contact points first. Keepo in mind, if you use too much heat(solder too long) you will likely fry some of the more sensitive components nearby.
Making your own Soldering flux: If the solder has 0% flux in it, then you must use flux, or make your own, you need 2 things, some sticky pine cones and Denatured Ethyl Alcohol, here's a how-to link: Make your own Eco-friendly soldering flux

Using flux: Place a very small amount on each surface, place 2 surfaces together, apply heat with one hand and solder wire with the other, the flux should burn off leaving a relatively clean surface for the solder to flow, if you see contaminants in the solder joint after you are done, you may need to re-heat the joint and clean off the crud/excess solder, and start over.
 
Last edited:
  • Like
Reactions: Hebrews12v2
Are you talking about this one?
If so... yea, I am back to that one now. It seems the small PDB I pictured earlier is defective, so I went to this one.
Yep. I bought that one and it is arriving Thursday afternoon, but of course i am leaving Thursday morning for Colorado. Just my luck.
 
So I'm getting a bit closer to completion... Put on the props, and did a basic Cleanflight config as well as binding my Taranis to the D4R-II receiver. I also made a cable to send telemetry data to the Naze then to my Taranis. Can't wait to fly it... The picture shows the receiver plopped on top of the quad, it's just there temporarily for binding and such...

IMG_0572.JPG
 
Looks awesome Kenjancef! I love the color highlights! Don't forget to ziptie the motor wires to the arm so they have less chance of getting snagged by something.
 
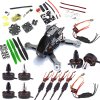
I am so glad I found this thread!! I am also on my second racing drone (first one is my profile pic) and it is also a Robocat 270. My first drone is 250 Storm and was assembled by the person I purchased it from, this time I bought a kit for the Robocat and am going to try and build it myself. I am excited but still learning terminology and where a few things go, so I will be bending your guys ears for the next couple weeks..lol. Here is a picture of everything that came in my kit, what else am I going to need to get her flying? I already have an AT9 RC that I am sure I can bind to this quad, and I have the FatShark FPV camera and goggles. Thanks in advance to all!!
Robocat.jpg
 
I have a Tools list in another thread you can look at HERE. You don't need all of them nor necessarily the same brands. It is meant to be generic and I'll try to keep it updated as time goes on.
 
I have a Tools list in another thread you can look at HERE. You don't need all of them nor necessarily the same brands. It is meant to be generic and I'll try to keep it updated as time goes on.

That's awesome, thanks Hebrew!!! I think I have the bare necessities, but there are a few things on there I want to pick up.
 
That's awesome, thanks Hebrew!!! I think I have the bare necessities, but there are a few things on there I want to pick up.

The only thing I don't like about kits is that you're pretty much stuck to the parts they give you. I'm sure it's cheaper in the end, but sometimes I like to splurge on an item, like the FC, so that's why I buy separate. And you also learn a bit more about how the parts work together when getting them separate... like what Kv means for motors, and how the size of the prop matters, and then how that relates to the battery size... it's a mess of info, but once you start learning it, it comes together. I am still learning Cleanflight since my first build, a 500mm quad, uses a Pixhawk with Mission Planner. I still have a LOT to learn, but it's fun.

As an amateur/beginner/semi intermediate I'll try to help the best I can...
 
  • Like
Reactions: Jack Ley
So an update on my build... Did a bunch of work on the "upper deck" of my Robocat last night, mounted the FPV camera to the front plate, using standoffs and hot glue, also mounted my video Tx, and neatened up the wires. I converted a female JST connector to a male JST connector for power to plug into my PDB. It powers up, but haven't tested the camera yet..

Slowly but surely....

IMG_0577.JPG IMG_0593.JPG IMG_0594.JPG IMG_0595.JPG
 
Last edited:
  • Like
Reactions: Hebrews12v2
So an update on my build... Did a bunch of work on the "upper deck" of my Robocat last night, mounted the FPV camera to the front plate, using standoffs and hot glue, also mounted my video Tx, and neatened up the wires. I converted a female JST connector to a male JST connector for power to plug into my PDB. It powers up, but haven't tested the camera yet..

Looks great kenjancef!! Can't wait to start putting mine together. Also on a side note, for everyone on this page, if you are like me and new or fairly new to racing quads, the batteries can be a bit confusing. On my fist one, the 250 Storm, I just bought a battery the seller suggested for a newbie quad racer, but I never really understand all the stuff written on the battery....mah, 25c-50c, and I had no idea how the voltage affected anything. Anyway, I found a GREAT article online that explains how RC batteries are rated and how they fit with your particular RC vehicle/bird. It's not dumbed down to make you feel like an idiot, but the guy does explain everything in very easy to understand and thorough way. Check it out................

Understanding RC LiPo Batteries

Oh, I think I had seen this page before... and yea, choosing a battery is a daunting task, as well as motors and props... they all work together, and it's hard to understand. I did choose my parts from reading a bunch of posts on different sites, so I compared and contrasted... and I think it's all going to work.

Here's where I stand: Currently I have a Naze32, but have it with vertical pins, and they just get in the way of everything, so I saw a recommendation for an SP Racing F3 clone, from Banggood. So stupidly I ordered it, being cheaper than the real thing. So I get it last week, and all I get is the flight controller... no pins or wires... so i complain to BG, so they send me another one.. .got it yesterday, and yep, just the flight controller, no pins or wires... lol... so I did what I should have done in the first place, buy the real thing. Paid twice as much, but I know I'll get all the parts. I did end up ordering pins for the original F3 clone and soldered them, looks ok. But in Cleanflight, I can't get the gyro to point the way it should, it's way off.

So I'll stick with original from now on... and part of the price goes to Cleanflight too, so that's good. Hopefully I'll have it in the air by next weekend. Still need to neaten up the upper deck, and I also decided to swap a D4R-II with a X4R-SB, hopefully that should be here by the end of next week.

whew.... :)

EDIT: By the way, when I went to email Banggood about this FC with no parts, I noticed that they actually changed their description saying that for US orders you only get the FC... what a sad story...
 

Members online

No members online now.

Forum statistics

Threads
6,175
Messages
44,827
Members
5,499
Latest member
mrpureflow619$