Welcome to FPVDronePilots!
Join our free FPV drone community today!
Sign up

Mobula7 EU-LBT TaranisQ X7 Binding Problem!

Perfect! Yes, those are the ones. You will find them useful for other things in the future perhaps - Arduino, Raspberry Pi, Arduino, Robotics, Synthesizers and all kinds of electronics. A great multi-use purchase!
 
Last edited:
  • Like
Reactions: HighTechPauper
  • Like
Reactions: HighTechPauper
Theoretically if you are careful about any shorting you can likely just push the 3 pins into the correct pads and flash, be careful not to put too much pressure so you don't crack the frame of the quad.
 
  • Like
Reactions: opts
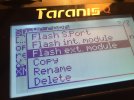
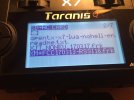
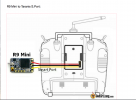
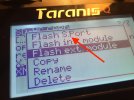
@thedroneracingpilot, you have the wrong flash selected, you need to be in Flash S-Port, that is the one that goes out the bottom of the radio. Internal is the internal XJT board, external is a module in the JR bay in the back top of the radio, and SBUS is the pins on the bottom left of the SD card. You only need to touch the solder with the pins to get an electrical connection and hold it steady for the 30 seconds it takes to flash the RX, if it starts and then fails you lost contact for a second, just try again, if it fails to communicate then you have the pins on the wrong pads or not connected enough for the radio to see the RX. In this instance only, SBUS and S-Port are the same.
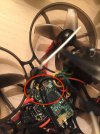
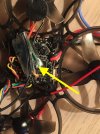
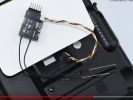
Do you mean that my cables should be connected here in the back?
and select the option Flash S.Port for the installation?

*I don't know if my cables are long enough to be connected on the back and touch the pads mean while I try flash the receiver.


Screen Shot 2020-10-27 at 9.35.01 PM.png
Screen Shot 2020-10-27 at 9.34.17 PM.png

IMG_7085.JPG
 
Last edited:
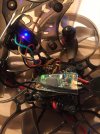
No, that is how it used to be done back in the day when radios didn't have an SBUS/S-Port connection in the bottom. You should be using the bottom connection on the left of the SD card, and using the Flash S-Port selection. Also make sure you have the pins on the correct pads, you show an R9 Mini which has more pads and not in the correct location compared to the XM+.
 
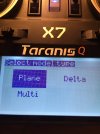
I will try to create a new bind and now I have to choose a model type, any idea of what it is?

View attachment 4686
Did the taranis say "flash successful/complete" or something to confirm, after you flashed the XM+

If so, the following instructions should see you over the finish line -

see my previous post:

to bind:
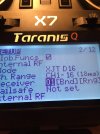
Put QX7 into:
XJT D16 mode.
Failsafe: No pulses
then select Bind mode - it will start bleeping.

Next, hold the bind button on the XM+ while connecting the battery. (it's fiddly but you'll get it. I used a blunt bamboo skewer to push the tiny button)
The Green light on xm+ goes solid, release button on xm+ and stop Bind mode on QX7.
Disconnect, then reconnect battery on the Mob7 and it should all be bound!

Finally connect to betaflight to set up your switches and sticks etc. and fly!
 
  • Like
Reactions: HighTechPauper

Members online

No members online now.

Forum statistics

Threads
6,258
Messages
45,072
Members
5,611
Latest member
talreli